The full guide
How to resize and compress a video for Reels and TikTok
Every app recompresses the videos you upload. You cannot stop that, but you decide what it starts from.
Every app recompresses the videos you upload. You cannot stop that, but you decide what it starts from. A video that arrives at the right size, in the right format and at a sensible bitrate keeps more detail after the app's own compression than a heavy 4K file that the app has to scale down, cut and squeeze in one go. It also uploads faster, which matters when you post from a phone on mobile data.
This guide covers the export settings that work for Reels and TikTok, how to fit a landscape video into a vertical frame without black bars, how bitrate turns into file size, and how to convert a video in your browser in about the time it takes to play it.
The export settings that work
These settings are the common ground across the platforms' help pages and most editors' presets.
| Setting | Reels and TikTok | Feed video | Square |
|---|---|---|---|
| Resolution | 1080 by 1920 | 1080 by 1350 | 1080 by 1080 |
| Aspect ratio | 9:16 | 4:5 | 1:1 |
| Codec and container | H.264 in MP4 | H.264 in MP4 | H.264 in MP4 |
| Frame rate | 30 frames a second | 30 | 30 |
| Video bitrate | About 5 to 8 Mbps | About 5 Mbps | About 4 to 5 Mbps |
| Audio | AAC or similar, about 128 kbps | Same | Same |
Two of these deserve a note. 4K is not better on a phone screen. The apps show video at about 1080 pixels wide and scale everything else down, so a 4K upload spends your data on pixels nobody sees. And 60 frames a second looks smoother for fast motion, sport or dance, but many videos are shown at 30 anyway; 30 is the safe default.
How bitrate becomes file size
Bitrate is how many bits each second of video gets. File size is simply bitrate times length.
| Quality setting | Video bitrate | One minute | Three minutes |
|---|---|---|---|
| High | 8 Mbps | About 61 MB | About 183 MB |
| Balanced | 5 Mbps | About 38 MB | About 115 MB |
| Small file | 2.5 Mbps | About 20 MB | About 59 MB |
These figures include 128 kbps of audio. Real files can come out smaller, because a video with little motion needs fewer bits than the recorder is allowed to use. A talking head against a plain wall compresses far better than a crowded street.
Which setting to choose
- High for footage with lots of detail or motion, and when you upload on Wi-Fi.
- Balanced for most reels: talking to the camera, products, tutorials.
- Small file when you post on mobile data, send a draft to a client, or the video is mostly static.
Fitting a landscape video into a vertical frame
A 16:9 video from a camera or a screen recording does not fill a 9:16 frame. There are two honest ways to fit it.
Fill and crop
The video is scaled up until it fills the whole frame and the sides are cut away. It looks native and full screen, but you lose most of a wide shot: in a 16:9 video turned into 9:16, only the middle third of the width remains. Use it when the subject is in the center, such as a person talking.
Fit with a blurred background
The whole video sits in the middle at full width, and the empty space above and below is filled with the same video, enlarged and blurred. Nothing is lost, the frame is full and it looks intentional rather than letterboxed. It is the better choice for wide shots, screen recordings and anything with text near the edges.

Converting a video in your browser
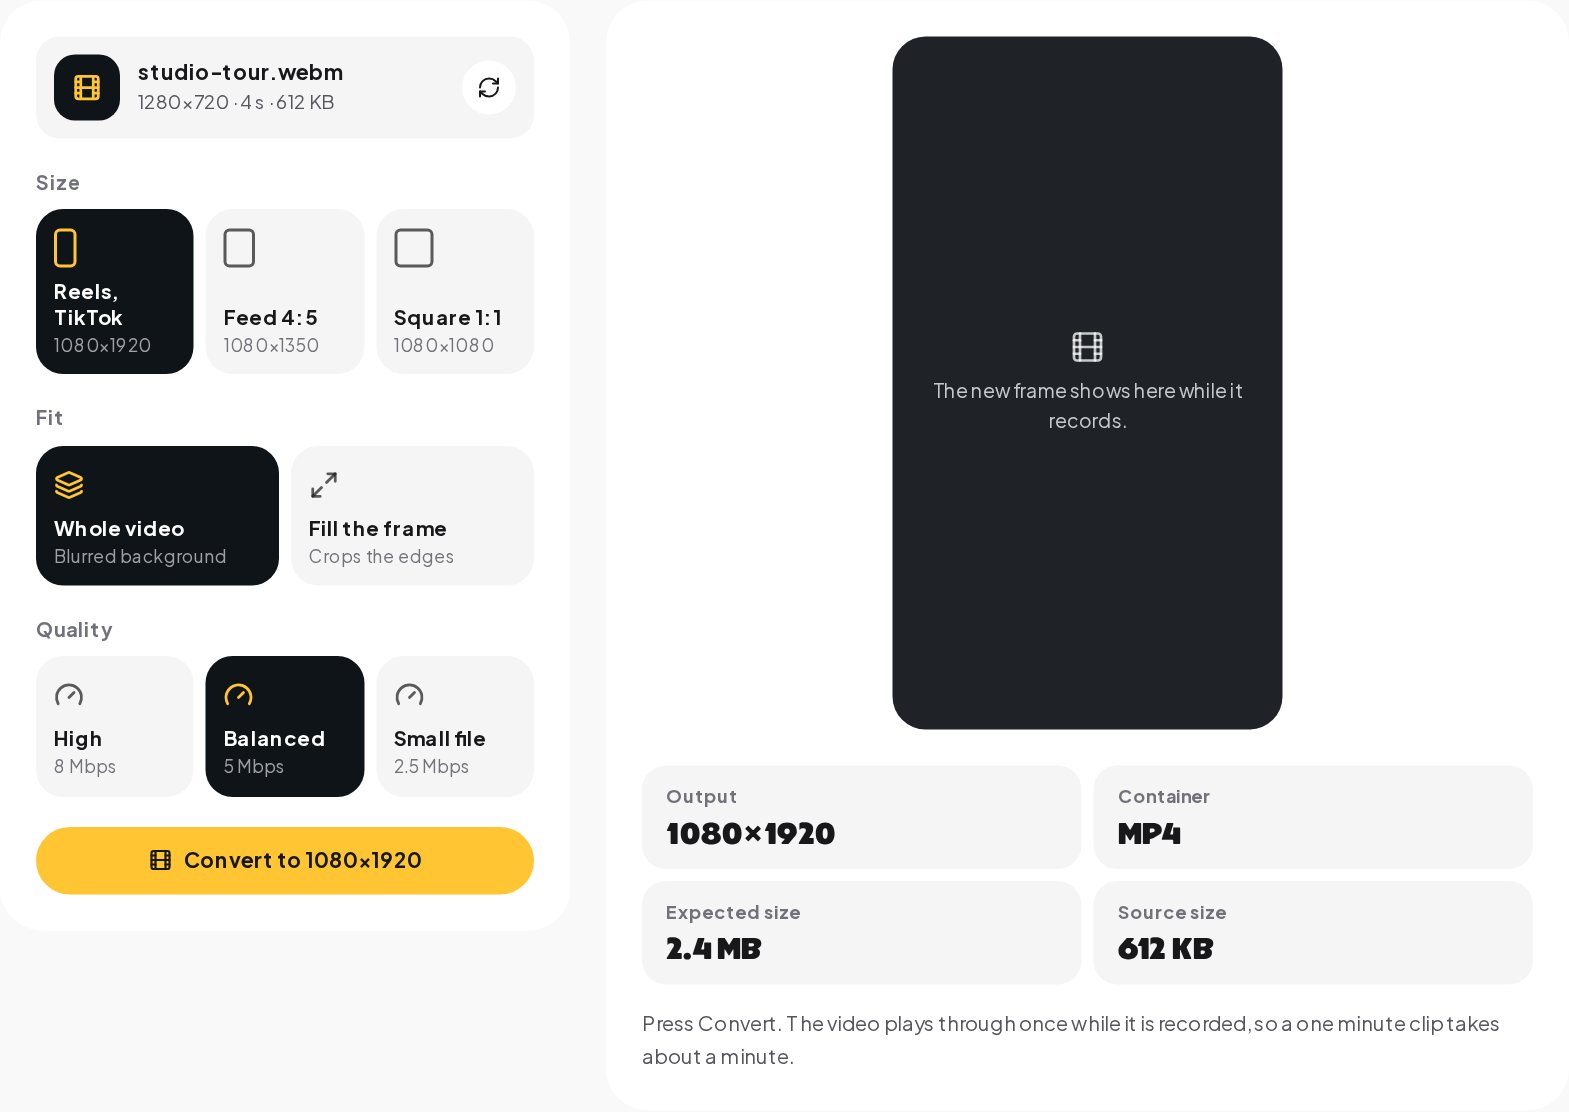
- Open the Video Resizer and choose a video. MP4, MOV and WebM work in most browsers.
- Pick the size: Reels and TikTok, feed 4:5 or square.
- Pick the fit: the whole video on a blurred background, or fill the frame.
- Pick the quality and check the expected file size.
- Press Convert. The video plays through once while it is recorded, so a one minute clip takes about a minute. Keep the tab open and in front until it finishes.
- Download the MP4.
Your video never leaves your device. The browser draws each frame at the new size and records the result together with the sound.
Which browsers save MP4
Recent versions of Chrome, Edge and Safari can record MP4. A browser that can only record WebM, such as some versions of Firefox, is flagged before you start, because Instagram does not accept WebM uploads.
Keeping quality after you upload
The export is half of it. A few settings in the apps protect what you exported.
- Upload on Wi-Fi when you can. On mobile data the apps may upload a lower quality version.
- Turn on high quality uploads. Instagram has a setting for uploading at the highest quality in its media quality options. Check it once on every phone you post from.
- Avoid thin, small text. Compression blurs fine detail first. Use bold text at a size that reads on a phone.
- Do not export, re-export and export again. Each round of compression loses detail. Convert once from the best source you have.
- Keep the length in mind. Shorter videos are easier to watch to the end, and the app gets a clean signal when people do.
Common problems and fixes
- Black bars at the top and bottom. The video was fitted without a background. Use fit with a blurred background, or fill and crop.
- A blurry upload from a sharp source. Often a mobile data upload or a very low bitrate. Try the balanced setting and upload on Wi-Fi.
- The sound is out of sync. It can happen with variable frame rate recordings from phones. Re-export from your editor at a constant 30 frames a second first.
- The file is still large. Choose the small file setting, or trim the video before converting; length is the biggest factor in size.
- The app rejects the file. Check that the download is MP4, not WebM, and that it plays on your phone before you upload.
Recording settings that make export easier
Good exports start with good recordings. A few phone settings save trouble later.
- Resolution and frame rate. Record at 1080p or 4K at 30 frames a second for talking and products, 60 for fast motion. 4K is useful when you plan to crop a landscape shot into a vertical one, because the crop still has enough pixels.
- Vertical when you can. Filming in 9:16 avoids cropping altogether. Use landscape only when the content is wide.
- HDR. Some phones record in HDR by default. On many screens and after upload, HDR footage can look washed out or too bright. If your reels look different after posting, try recording with HDR off or exporting in standard dynamic range.
- Stabilization. Turn it on for handheld shots; shaky footage needs far more bits to look clean after compression.
- Light. Noise in dark footage eats bitrate. A window or a small light in front of you makes the video look sharper at any bitrate.
Sound that holds up
Viewers forgive a soft picture faster than bad sound.
- Record close to the speaker, or use a small clip-on microphone.
- Keep music lower than the voice; the apps' own compression flattens the mix further.
- Leave a short moment of silence at the start and the end, so the first word is not cut.
- Use music you are allowed to use. The apps offer licensed sounds inside the editor; music added outside may be muted or limited.
Length and trimming
The biggest factor in file size is length, and the biggest factor in how a reel performs is often the first seconds. Trim dead air at the start, cut pauses between sentences and end soon after the point is made. A reel that is a few seconds shorter is smaller, faster to upload and more likely to be watched to the end.
Covers, captions and the first seconds
The video file is only one part of a reel that performs. The cover decides whether people tap it from your profile; the Reels Cover Maker makes one that reads in the grid. On-screen text has to stay clear of the app interface; the Safe Zone Checker shows where the buttons and the caption sit. And the first two seconds decide whether people keep watching.
From views to conversations
A sharp video earns comments and DMs: people ask for the price, the link, the recipe or the booking. Put a keyword in the video and in the caption, and ChatinFlow's Instagram automation replies to each comment and message with what they asked for, in seconds and at any hour. The video gets the attention; the automation makes sure it turns into customers.
Quick answers
What size should a reel be?
1080 by 1920 pixels, a 9:16 frame. The resizer also makes 1080 by 1350 for feed videos and 1080 by 1080 for square ones.
What happens to a landscape video in a 9:16 frame?
It is fitted in the middle, with a blurred copy of the same video filling the space above and below instead of black bars.
Is my video uploaded to be converted?
No. The browser records the new version as the video plays, on your own device.
Sources
- MediaRecorder, MDN Web Docs, the browser API the resizer records with.